
Let's Make a Sourdough Starter
Disclosure: As an Amazon Associate, I earn from qualifying purchases. This post contains affiliate links, which means I may receive a small commission if you purchase through these links at no extra cost to you. #ad
A True Beginner's Guide to Making Your First Sourdough Starter
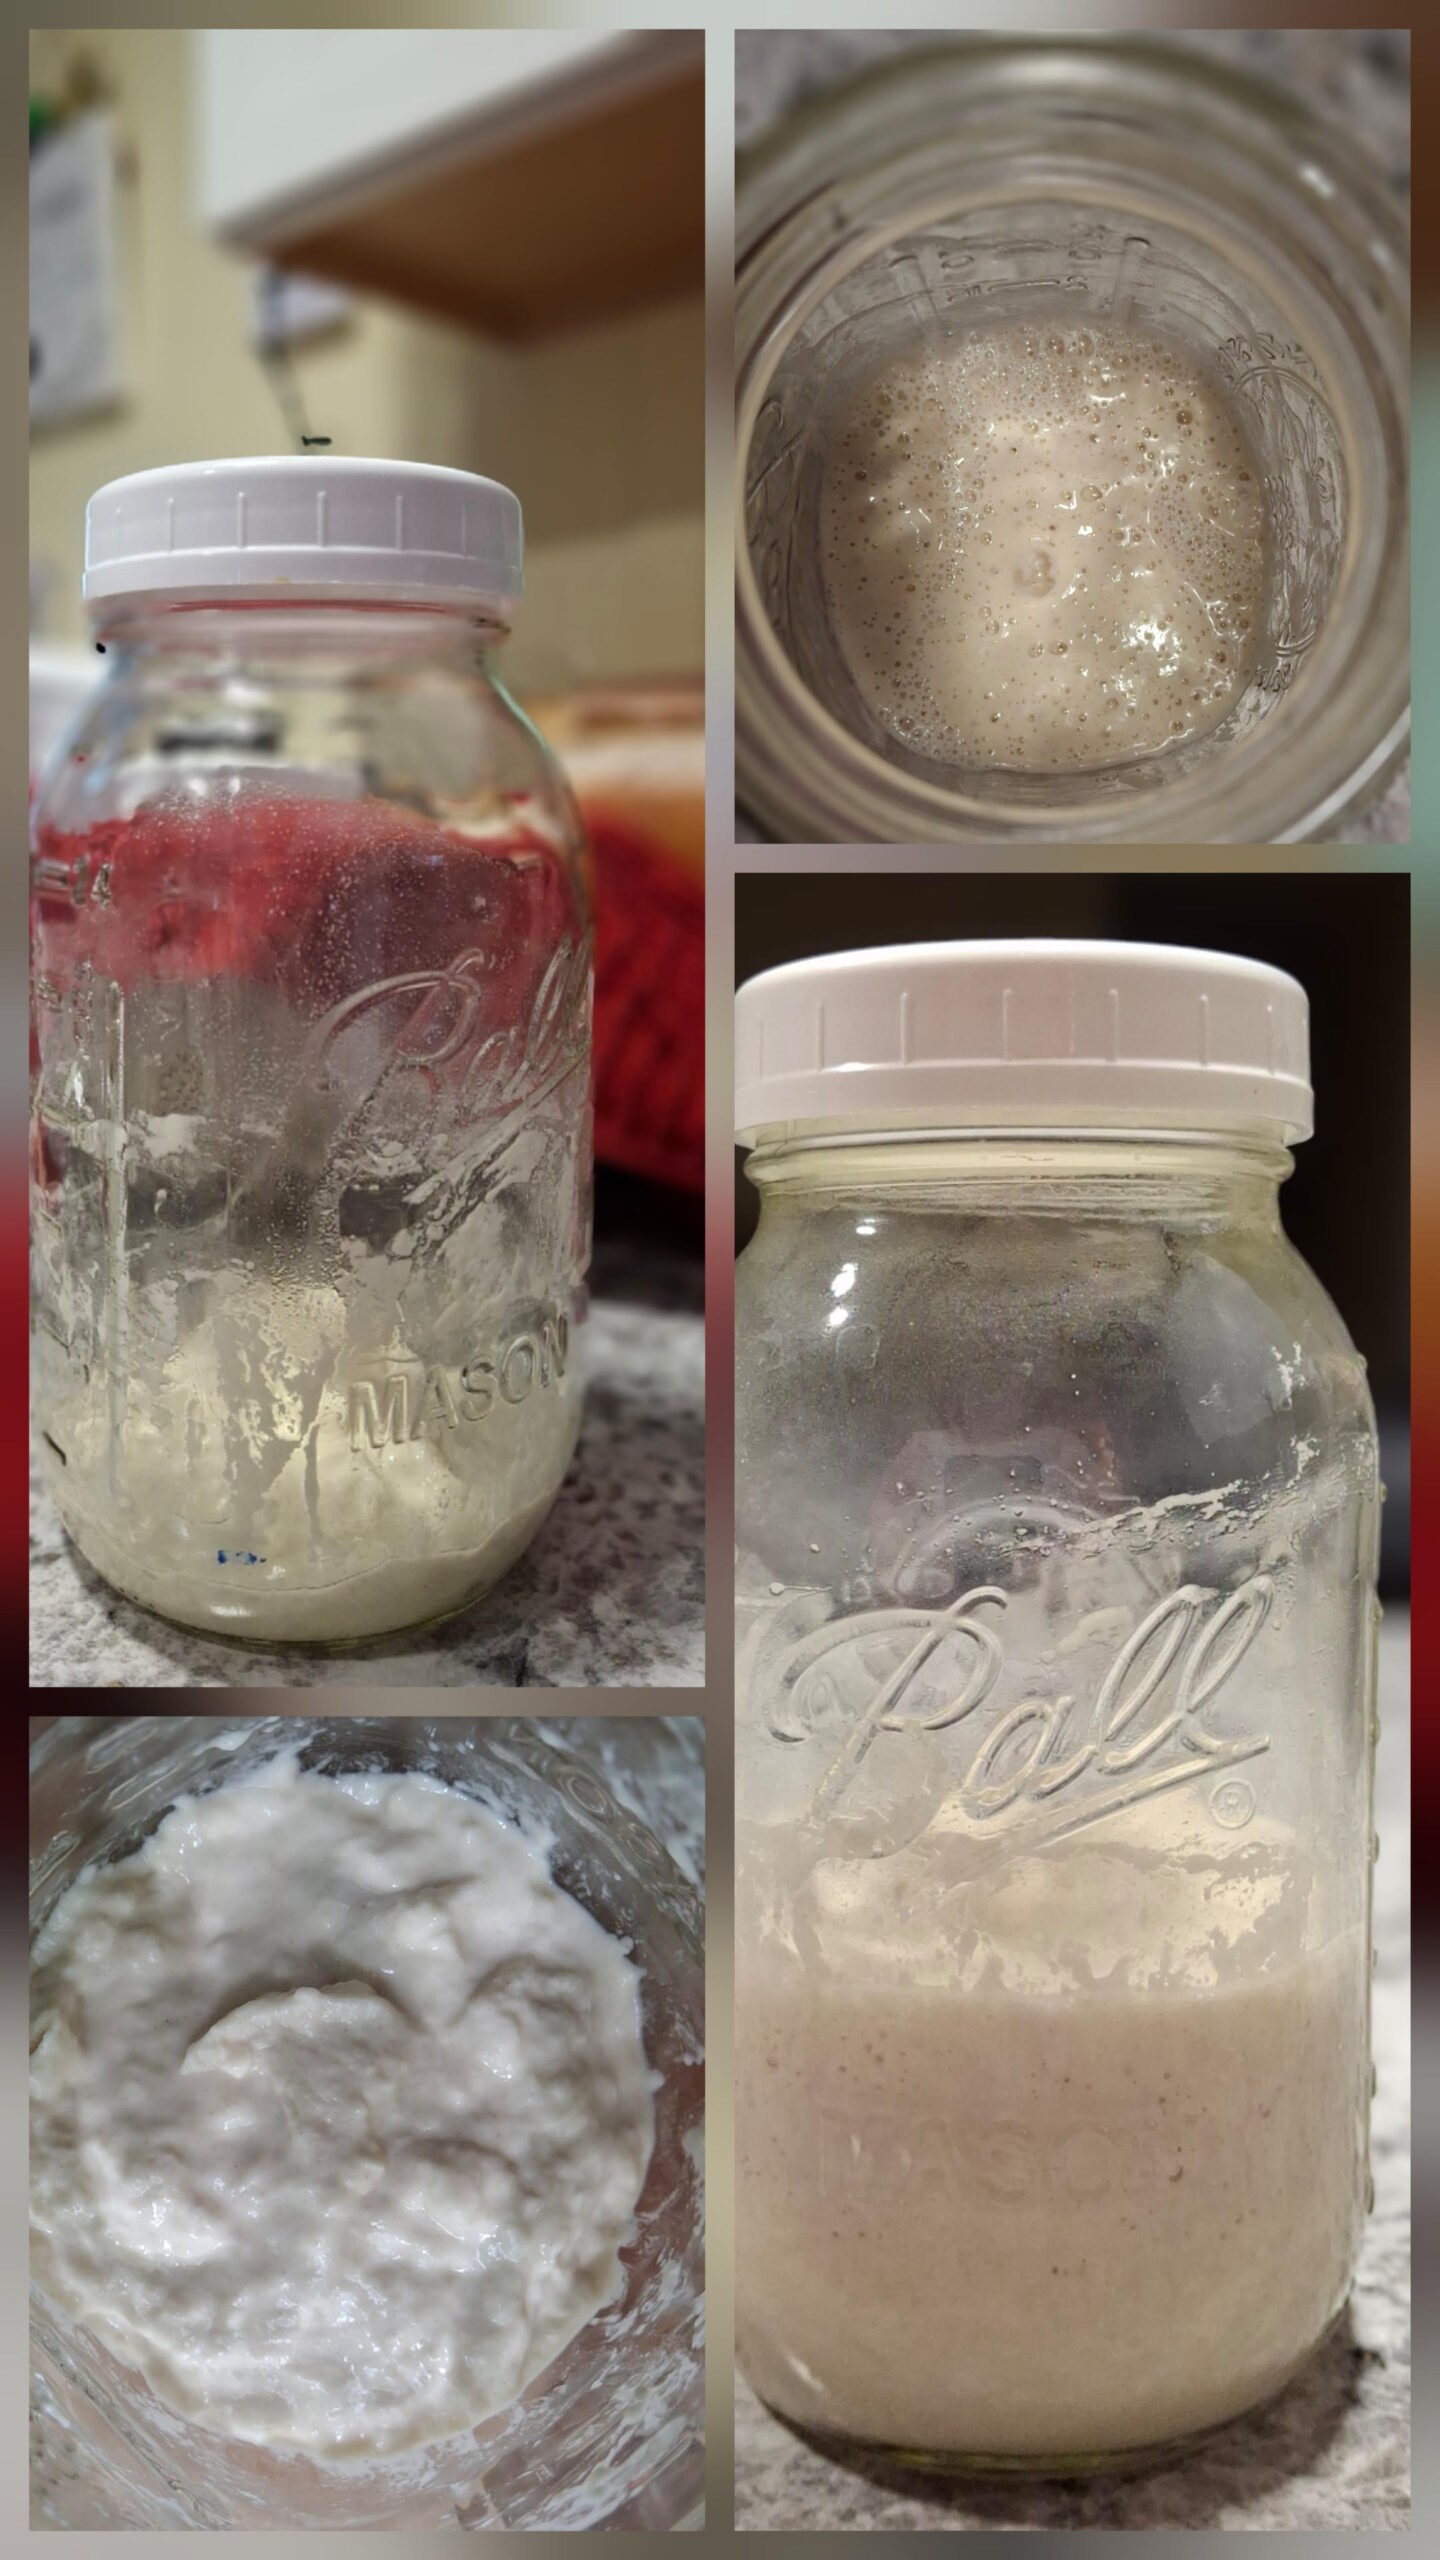
If you’ve never made sourdough before, you may have looked at sourdough recipes and thought:
Okay… but what am I actually supposed to do?
What’s a starter?
What kind of flour do I need?
How much water?
What kind of jar?
Does it need a lid?
Why are people throwing some of it away?
And what the heck does “discard” mean?
If that’s where you are, you’re in the right place.
We’re going to start at the very beginning and walk through this step by step, without assuming you already know anything about sourdough.
You don’t need fancy equipment.
You don’t need a special sourdough jar.
And you don’t need years of baking experience.
You need flour, water, a jar, and a little patience.
That’s it.
First, What Exactly Are You Making?
A sourdough starter is simply a mixture of flour and water that develops naturally occurring wild yeast and beneficial bacteria.
Those microorganisms ferment the flour and produce the bubbles and gases that eventually help your bread rise.
Think of your starter as a little living culture that you’re going to feed and take care of.
You don’t have to understand all the science behind it to make one.
You just need to know what to add, when to feed it, and what you’re looking for.
What You'll Need
1. Flour
For this starter, we’re using:
King Arthur Organic Unbleached Bread Flour (paid link)
You don’t have to use this exact flour, but an unbleached bread flour is a great place to start.
Organic flour isn’t required. Bread flour isn’t absolutely required either. There are plenty of other flours that can be used for sourdough.
But if you have unbleached bread flour in your pantry, you’re ready to go.
2. Water
We’re using:
Room-temperature filtered water
If you already filter your drinking water, use it.
Regular tap water may work just fine, too. However, depending on where you live, tap water can contain chlorine or chloramine, and those can sometimes interfere with the microorganisms we’re trying to establish.
There’s no need to warm your water.
Room temperature is perfect.
If you use a reverse-osmosis or extremely purified water system, that’s a little different from ordinary filtered drinking water. But for typical household filtered drinking water, you’re fine.
3. 32-Ounce Glass Jar
This is the jar I recommend:
32-Ounce (1-quart) Glass Jar (paid link)
You might look at the small amount of starter we’re making and wonder why you need such a big jar.
Because your starter is going to grow.
Once it becomes active, it can rise to twice its original size—or sometimes even more.
The extra room keeps your starter from climbing right out of the jar and making a mess.
A straight-sided jar is especially helpful because it makes it easy to see how much your starter has risen.
And don’t worry about buying a special “sourdough jar.”
A regular clean 32-ounce glass canning jar works beautifully.
4. A Lid—but Don’t Seal It Tight
Your starter needs to be covered, but not sealed airtight.
As your starter ferments, it produces carbon dioxide gas.
We want to keep dust and other kitchen debris out, but we don’t want to trap those gases inside a tightly sealed jar.
If you have the Plastic Canning Lids (paid link) that fit your jar, they’re an excellent choice.
Put the lid on, but don’t tighten it so much that it creates an airtight seal.
You can also use a regular metal canning lid loosely.
Plastic wrap can work, too, if that’s what you have. Just loosely cover the jar rather than sealing it tightly.
The simple rule:
Cover it. Don’t seal it.
That’s all you need to remember.
5. A Kitchen Scale—Optional
A Kitchen Scale (paid link) is helpful and more accurate, but you do not need one to make a sourdough starter.
Sourdough recipes often use grams because flour and water have different weights for the same volume.
For example, ¼ cup of flour does not weigh the same as ¼ cup of water.
So when we say:
25 grams flour + 25 grams water
we mean equal weights, not equal cups.
If you have a kitchen scale:
Use:
25 grams flour + 25 grams water
This is the method I recommend because it is simple, consistent, and easy to repeat.
If you don’t have a scale:
No problem.
Use approximately:
3 tablespoons + 1 teaspoon flour
and
1 tablespoon + 2 teaspoons water
Volume measurements aren’t quite as precise because flour can be scooped differently from one person to another.
But please don’t let the lack of a kitchen scale stop you from making a starter.
You can absolutely begin with the measuring cups and spoons you already have.
6. Something to Stir With
You don’t need a special sourdough tool.
- Spoon
- Fork
- Silicone spatula (paid link)
will work perfectly.
In fact, a small silicone spatula is especially handy because you can stir the starter and then scrape the sides of the jar clean.
What about an electric milk frother?
Skip it.
A milk frother isn’t necessary and can introduce a lot of extra air while making your starter messy and harder to judge.
Your starter does not need to be whipped.
You simply need to mix the flour and water thoroughly.
How much should you stir?
Just stir until:
- All the flour is incorporated
- There are no dry pockets
- There are no obvious lumps of dry flour
- Everything is evenly mixed
That’s it.
You don’t need to beat it vigorously.
7. Something to Mark the Jar
This little trick will make your life much easier.
You can use:
- A rubber band
- A piece of masking tape
- A Washable Marker (paid link)
You’ll use it to mark the level of your starter after feeding.
That way, you’ll actually be able to see how much it rises.
Before We Begin
Put your clean jar on the counter.
Have your flour and water ready.
Have your lid nearby.
Grab your spoon or spatula.
And grab something to mark the level of your starter.
That’s all.
Let’s make a starter.
Day 1 — Your Very First Starter
Place your jar on the counter.
If you’re using a kitchen scale:
Add:
25 grams flour
Then add:
25 grams room-temperature filtered water
If you’re measuring without a scale:
Add approximately:
3 tablespoons + 1 teaspoon flour
Then add:
1 tablespoon + 2 teaspoons water
Now stir everything together.
You want all of the flour and water completely incorporated.
Make sure there isn’t any dry flour hiding at the bottom of the jar.
Your mixture should look something like thick pancake batter.
It doesn’t have to look perfect.
Scrape down the sides of the jar.
Now put your lid on.
Remember: Don’t seal it tightly.
Mark the level of your starter with your rubber band, tape, or marker.
Then put the jar somewhere comfortable in your kitchen.
Choose a place that is:
- Away from direct sunlight
- Away from extreme heat
- Away from very cold drafts
- At a comfortable room temperature
You don’t need a special proofing box.
Your kitchen is fine.
And now…
leave it alone.
You may see bubbles.
You may see nothing.
You may even notice a little rise.
All of those things can be normal on Day 1.
Your starter has just begun.
Day 2 — Time to Feed It
Take a look at your jar.
You might see bubbles.
You might see a little rise.
You might notice that it smells different.
Or you might look at it and think:
Well… that doesn’t look like much.
That’s okay, too.
Your starter is still getting established, and every starter develops at its own pace.
Today, we’re going to feed it.
But first, we need to remove some of it.
Don’t worry. I’ll explain.
First, Let’s Measure the Starter We’re Keeping
On Day 1, you added:
25 grams flour + 25 grams water
So you started with approximately 50 grams of starter.
Today, we want to keep exactly 25 grams of starter.
Don’t Rely on Your Eyes
This is important.
Don’t simply look at the jar and scoop out what appears to be half.
Your starter may have risen overnight, and the amount you see in the jar doesn’t tell you exactly how much starter you’re keeping.
You could easily think you’ve removed half when you’ve actually kept 40, 50, or even more grams.
That’s exactly what we don’t want.
We’re going to feed the starter a specific amount of flour and water, so the amount of starter we carry forward matters.
The Easiest Way to Get It Right
If you have a Kitchen Scale…
The Easiest Way to Get It Right
If you have a Kitchen Scale (paid link), this is the easiest method.
Grab a Clean Jar (paid link).
Place it on your kitchen scale and tare the scale to zero.
Now transfer starter from your original jar into the clean jar until the scale reads:
25 grams
Stop there.
25 grams is the amount of starter we’re keeping.
The remaining starter can be discarded for now.
Don’t worry about wasting it. Once your starter is mature and healthy, you’ll be able to save your discard and use it in recipes.
Now Feed Your Starter
You’re going to feed the 25 grams of starter you just transferred into the clean jar.
Add:
25 grams King Arthur Organic Unbleached Bread Flour
Then add:
25 grams room-temperature filtered water
Your jar should now contain:
25 grams starter
+ 25 grams flour
+ 25 grams water
This is a 1:1:1 feeding.
Stir everything together until all of the flour and water are completely incorporated.
Make sure there isn’t any dry flour hiding at the bottom of the jar.
You don’t need to whip it.
A spoon or silicone spatula is perfect.
Scrape down the sides of the jar.
Mark the new level with your rubber band, tape, or marker.
Put your loose lid back on.
Then put your jar somewhere comfortable in your kitchen.
One Last Thing
Don’t worry if you don’t see a dramatic rise today.
You may see bubbles.
You may see a little rise.
You may see very little activity.
Your starter is still developing.
For now, we’re simply giving it a consistent amount of starter, flour, and water and giving it time.
25 grams starter.
25 grams flour.
25 grams water.
That’s all you need today.
Keep Your Feeding Time Consistent
Try to feed your starter at roughly the same time each day. You don’t have to be exact to the minute, but choosing a routine—such as feeding it each morning—makes it easier to keep your starter on a consistent schedule.
What Does "Discard" Mean?
When sourdough people say discard, they’re simply talking about removing some of the starter before feeding it.
You’re not throwing away your entire starter.
You’re keeping part of it and giving that portion fresh flour and water.
Why?
Because if you kept adding more flour and water every day without removing any starter, you’d quickly end up with a giant jar—or even a bucket—of starter.
Nobody needs that sitting on their kitchen counter.
Discarding allows us to keep a manageable amount while giving the remaining starter plenty of fresh food.
One Important Discard Tip
When you’re first building your starter, scrape the discarded starter directly into the trash or a compost bin. Never pour raw sourdough starter down your kitchen sink drain. The thick flour mixture can stick to the inside of your pipes and cause a blockage.
Day 3 — Don’t Panic!
This is the day I really want you to remember.
Your starter may have looked exciting yesterday.
Maybe it was bubbly.
Maybe it even rose quite a bit.
And today?
Nothing.
Or maybe just a few bubbles.
Maybe it looks almost exactly the way it did yesterday.
Don’t throw it away.
Don’t assume you killed it.
Don’t start over.
This is actually a very common part of making a new sourdough starter.
A new starter can have a burst of early activity and then become quiet while the microbial community continues developing. Quiet doesn’t mean dead.
Keep Going
Today, we’re going to follow the same feeding routine.
Don’t rely on your eyes to decide how much starter to keep.
Using your kitchen scale, place a clean jar on the scale and tare it to zero.
Transfer:
25 grams starter
into the clean jar.
Then add:
25 grams flour
and
25 grams room-temperature filtered water.
So your feeding is:
25 grams starter + 25 grams flour + 25 grams water
Stir everything together.
Scrape down the sides.
Mark the new level.
Put your loose lid back on.
And leave it alone.
What If It Doesn’t Rise?
That’s okay.
At this stage, we’re not expecting your starter to behave perfectly every day.
You may see:
- Lots of bubbles
- A little rise
- Very little activity
- A quiet day
- Changes in smell
All of these things can happen while your starter is developing.
Keep feeding it. Keep watching it. Give it time.
Your starter doesn’t need to be impressive every day.
It just needs to keep going.
Day 4-7 — Keep Going
For each of these days, repeat the same feeding routine once every 24 hours: keep 25 grams of starter, add 25 grams of flour and 25 grams of water, then stir and let it rest until the next feeding.
By now, you may be starting to notice a pattern.
Maybe your starter is bubbling more.
Maybe you’re seeing a little rise.
Maybe it still seems quiet.
All of that is okay.
A new starter doesn’t always develop on a perfect schedule. The important thing is to keep giving it consistent feedings and watching for changes.
Each Day:
1. Measure out 25 grams of starter.
Don’t rely on how much starter appears to be in the jar. Use your kitchen scale whenever possible.
Transfer the 25 grams of starter into a clean jar.
2. Add 25 grams flour.
3. Add 25 grams room-temperature filtered water.
4. Stir until everything is completely combined.
Make sure there isn’t any dry flour hiding at the bottom.
5. Scrape down the sides of the jar.
6. Mark the new level.
Your mark will help you see whether your starter is actually rising, even when the change is small.
7. Cover the jar loosely.
Remember, we don’t want to seal it tightly.
8. Let it sit.
Then watch what happens.
What Are We Looking For?
Over the next several days, you should begin looking for a more predictable pattern:
Feed → bubbles → rise → peak → fall
You may not see that pattern yet, and that’s okay.
Your starter may take longer than seven days to become strong enough to bake with.
Don’t feel like you’ve failed if Day 7 arrives and your starter isn’t doubling yet.
Keep going.
The goal isn’t to reach a certain day on the calendar.
The goal is to develop a starter that is active, predictable, and strong enough to raise bread.
But here’s something very important:
Your Starter Does NOT Have to Be Ready on Day 7
Seven days is not a deadline.
Some starters become active quickly.
Others take 10 days, two weeks, or sometimes even longer.
Your kitchen temperature, flour, water, and the microorganisms naturally present in your environment can all affect how quickly your starter develops.
So don’t compare your starter to somebody else’s starter online.
Watch yours.
What Should My Starter Look Like?
As your starter becomes established, you may notice:
- Bubbles throughout the mixture
- Bubbles on the surface
- A pleasant sour or fermented smell
- The starter becoming lighter and airier
- The starter rising after you feed it
- The starter eventually falling back down
You may also start noticing a pattern.
You feed it.
It rises.
It reaches its highest point.
Then it starts to fall.
That’s a good thing.
It means your starter is becoming active.
How Do I Know When I Can Make Bread?
Don’t go by the number of days.
Go by your starter.
A mature starter should be consistently active after feeding.
Ideally, it should rise significantly—often close to doubling—within several hours after being fed.
It should have plenty of bubbles and a pleasant fermented smell.
Most importantly, it should be doing this reliably, rather than having one exciting day and then becoming completely quiet.
That’s when you’re getting close to baking your first loaf.
What If It Smells Sour?
That’s normal.
It’s called sourdough for a reason!
A healthy starter can smell:
- Tangy
- Sour
- Yeasty
- Fruity
- Slightly sweet
- Fermented
The smell can change as your starter matures.
What If It Doesn't Bubble?
Don’t panic.
A young starter can be slow.
A cool kitchen can also slow fermentation.
Keep feeding it consistently and give it time.
What If It Bubbled and Then Stopped?
This is one of the most common things that surprises beginners.
You may see lots of activity during the first few days and then suddenly…
nothing.
This doesn’t necessarily mean your starter has failed.
It’s common for a new starter to have an early burst of activity followed by a quieter period.
Keep going.
What If I See Liquid on Top?
You may eventually see a thin layer of liquid sitting on top of your starter.
This can happen when your starter has used up much of its available food.
It’s not automatically a sign that something is wrong.
Depending on how your starter looks and smells, you can stir the liquid back in or pour it off before feeding.
Then continue your normal feeding routine.
What If Your Starter Smells Like Acetone?
A young sourdough starter may go through a stage where it smells strongly like acetone, nail-polish remover, or even very strong alcohol.
Don’t panic.
That smell usually means your starter is hungry. It has been fermenting and has used up much of the available food.
You may notice that your starter is:
- Very bubbly
- Smelling strongly of acetone
- Rising a little, but not very much
- Becoming thinner or more runny
- Showing lots of activity without a clear rise-and-fall pattern
This can be especially confusing because you may look at the jar and think, “If it’s bubbling this much, why isn’t it rising?”
The answer is that bubbles and rise aren’t exactly the same thing.
Your starter can be producing plenty of fermentation gases while still being too young or too weak to trap those gases well enough to rise significantly.
So What Should I Do?
If your starter is bubbly and smells strongly of acetone, give it a good feeding.
Instead of keeping a large amount of starter, keep a smaller portion and give it plenty of fresh food.
For example:
25 grams starter + 50 grams flour + 50 grams water
That’s a 1:2:2 feeding.
Mix everything thoroughly, scrape down the sides of the jar, and mark the starter’s level.
Then let it sit somewhere comfortable and watch what happens.
You don’t need to see it double immediately.
What we’re looking for is progress.
Maybe it rises a little more than it did yesterday.
Maybe the bubbles become more evenly distributed.
Maybe the smell becomes less sharp.
Maybe, over several feedings, you begin to see a more predictable pattern.
All of those are signs that your starter is developing.
Watch for the Pattern
The goal isn’t simply to see bubbles.
Eventually, you want to see:
Feed → bubbles → rise → peak → fall
As your starter becomes stronger, that pattern should become easier to recognize.
And remember: a starter does not have to be ready on Day 7.
If your starter is bubbly, smells fermented, and is showing even a little rise, there is still life and activity happening in that jar.
Give it food.
Give it time.
And keep watching the jar.
Your starter is learning how to become strong enough to raise bread.
What If I See Mold?
This is different.
If you see:
- Obvious mold
- Fuzzy growth
- Unusual colors that look like contamination
- A clearly rotten or putrid smell
Don’t try to save it.
Throw it away.
Wash your jar thoroughly and start again with fresh flour and water.
When you’re unsure whether something is safe, it’s better to start over.
A Few Things That Will Make This Easier
Keep your starter in the same spot.
That way, you’ll get familiar with how quickly it behaves in your particular kitchen.
Mark your jar after every feeding.
You’ll be amazed how much easier it is to see the rise.
Don’t keep changing everything.
If your starter seems slow, don’t immediately change the flour, water, temperature, feeding schedule, and container all at once.
Give it some time.
Don’t compare your starter to someone else’s.
Sourdough starters are affected by their environment.
Your kitchen isn’t their kitchen.
Your flour isn’t necessarily their flour.
Keep your flour fresh: If you’re going to keep baking sourdough, a good
An Airtight Flour Container (paid link) can make storing your flour easier and keep your baking area organized.
Your temperature isn’t their temperature.
Your starter may develop differently.
That’s okay.
Once Your Starter Is Mature
Once your starter is consistently active, you don’t necessarily have to keep it on your counter forever.
If you’re baking frequently, you can maintain it at room temperature with regular feedings.
If you only bake occasionally, you can move it to the refrigerator and maintain it there, feeding it when needed before baking.
That’s one of the wonderful things about sourdough.
Once you’ve established your starter, you can keep it going for a very long time.
Your Sourdough Starter Cheat Sheet
What you need:
32-Ounce (1-quart) Glass Jar (paid link)
King Arthur Organic Unbleached Bread Flour (paid link)
Room-temperature filtered water
Loose-fitting lid
Kitchen Scale (paid link) — optional
Spoon, fork, or Silicone Spatula (paid link)
Rubber band, tape, or marker
If using a scale:
25 grams flour + 25 grams water
If using measuring cups and spoons:
3 tablespoons + 1 teaspoon flour
and
1 tablespoon + 2 teaspoons water
Remember:
Equal weights—not equal volumes.
Cover it, but don’t seal it airtight.
A regular spoon or silicone spatula is all you need.
Skip the electric milk frother.
Stir until everything is combined. Don’t whip it.
Mark the level after feeding.
Feed consistently.
Don’t panic if activity slows down.
Don’t expect it to be ready on Day 7.
Watch the starter, not the calendar.
And Then Comes the Fun Part
Eventually, you’re going to look at that jar and realize something pretty amazing.
It’s alive.
You made it with nothing more than flour, water, and a little patience.
And now you have your very own sourdough starter.
From that little jar, you can make homemade bread, rolls, pancakes, crackers, pizza, and so many other things.
There’s something really satisfying about knowing that the bread you’re making started right there in your own kitchen.
Flour.
Water.
Time.
That’s the beginning of your sourdough journey.
Meet Willow: The Real-Life Journey Behind This Guide
Making a sourdough starter sounds simple.
Flour. Water. Patience.
But sometimes the journey has a few unexpected twists.
My own starter, Willow, had plenty of them—from exciting bubbles and sudden changes to wondering whether she was hungry, ready, or doing exactly what a young sourdough starter is supposed to do.
And eventually, after all that waiting and watching, Willow’s discard became something delicious.
Want to follow Willow’s journey from the beginning? Read her full story here.
3 Responses