
Blueberry Lemon Cream Cheese Sourdough Bread
#ad Disclosure: As an Amazon Associate, I earn from qualifying purchases. This post contains affiliate links, which means I may receive a small commission if you purchase through these links at no extra cost to you.
Blueberries. Lemon. Cream cheese. Sourdough.
Put them all together and you get a loaf that feels a little special without being overly complicated.
This Blueberry Lemon Cream Cheese Sourdough Bread has a slightly sweet, tender sourdough base with a hint of fresh lemon, creamy vanilla cream cheese, and juicy blueberries tucked throughout the layers. The crust gets beautifully golden and crisp in a cast-iron Dutch oven, while the inside stays soft and flavorful.
And I want to tell you something before you start.
This is sourdough. Nothing is ever exactly exact.
Your starter may behave differently than mine. Your kitchen may be warmer or cooler. Your flour may absorb water differently. And your oven may have its own personality.
I know mine does.
So use the times below as guidelines rather than absolute rules. Watch your dough, watch your bread, and—especially with sourdough—learn to trust what you’re seeing.
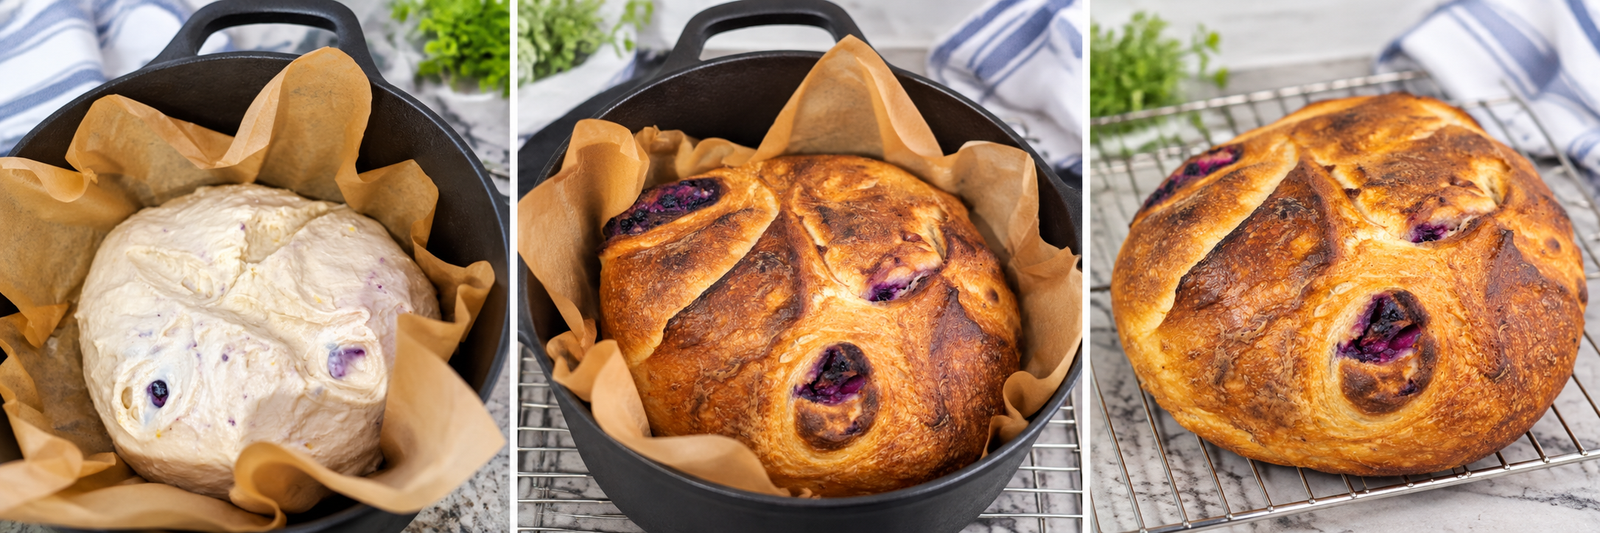
Ingredients
For the Dough
- 80g sourdough starter, fed about 12 hours earlier and slightly deflated
- 1 cup warm water
- 3 cups bread flour
- 1 tablespoon granulated sugar
- 2 tablespoons salted butter, melted
- 1 teaspoon salt
- 1 large egg
- 1 teaspoon fresh lemon zest
- 2 tablespoons fresh lemon juice
For the Cream Cheese Filling
- 8 ounces cream cheese, softened
- ¼ cup granulated sugar
- 1 large egg
- 1 teaspoon vanilla extract
For the Blueberries
- 1 cup fresh or frozen blueberries
- 1 tablespoon all-purpose flour
Important: The 1 tablespoon of flour for the blueberries is in addition to the 3 cups of bread flour used in the dough.
For Baking
- 2 ice cubes
Tools You'll Need
- Glass mixing bowls (paid link)
- Measuring cups & spoons (paid link)
- Small glass bowl for squeezing fresh lemon juice (paid link)
- Lemon grater/zester (paid link)
- Lemon juicer (paid link)
- Wooden spoon (paid link)
- Electric hand mixer (paid link)
- Rubber dough scraper (paid link)
- Silicone spatula (paid link)
- Bowl cover (paid link)
- Parchment paper (paid link)
- Scoring knife (paid link)
- Instant-read kitchen thermometer (paid link)
- Oven mitts (paid link)
- Cooling rack (paid link)
- Round cast-iron Dutch oven (paid link)
And yes, you absolutely need those oven mitts. That Dutch oven is going to be HOT. LOL.
How to Make Blueberry Lemon Cream Cheese Sourdough Bread
1. Mix the Dough
Add the sourdough starter, warm water, and sugar to a large mixing bowl. Stir until combined.
Add the bread flour, salt, melted salted butter, egg, lemon zest, and fresh lemon juice.
Mix with a wooden spoon until everything comes together into a shaggy dough.
Cover the bowl and let the dough rest for about 30 minutes.
2. Stretch and Fold
Over the next 2 hours, perform approximately four sets of stretch-and-folds, about 30 minutes apart.
Gently stretch one side of the dough upward and fold it over. Rotate the bowl and repeat until you’ve worked around the dough.
After the folds are finished, allow the dough to continue its bulk fermentation for approximately 5–6 hours, depending on your starter, kitchen temperature, and how your dough is behaving.
You are looking for dough that becomes smoother, puffier, and more elastic.
Watch the dough more than the clock.
That’s one of the biggest things sourdough has taught me.
3. Make the Cream Cheese Filling
Add the softened cream cheese, sugar, egg, and vanilla to a bowl.
Using an electric hand mixer, beat until smooth and creamy.
And try not to eat it with a spoon.
I’m just saying. LOL.
4. Prepare the Blueberries
Place the blueberries in a small bowl and gently toss them with 1 tablespoon of flour.
If you’re using frozen blueberries, you don’t need to thaw them first.
5. Stretch the Dough
Once the dough has finished its bulk fermentation, gently turn it out onto a lightly floured surface.
Using your hands, gently push and stretch the dough into a large rectangle, approximately ¼ inch thick.
It doesn’t have to be perfect.
We’re making bread, not building a house.
6. Add the Cream Cheese and Blueberries
Spread the cream cheese filling evenly over the dough, leaving about a 1-inch border around the edges.
Scatter the flour-coated blueberries evenly over the filling.
7. Roll and Shape
Starting from one of the long edges, gently roll the dough into a log.
Try to keep the filling inside as you roll, but don’t worry if a little escapes.
Pinch the seam and ends together.
Gently shape the loaf into a round, keeping the seam underneath.
8. Place on Parchment and Let Rest
Place a sheet of parchment paper on your work surface.
Set the shaped loaf on the parchment.
Cover and let the loaf rest for approximately 1 hour, or until it looks slightly puffy.
While the dough is resting, preheat your oven with the round cast-iron Dutch oven inside to 475°F.
Allow the Dutch oven to heat for approximately 30–45 minutes.
9. Score the Loaf
Keep the loaf on the parchment paper.
Use your scoring knife to score the top of the bread.
I found the parchment especially helpful here because it allows you to score the loaf and then transfer the entire thing into the very hot Dutch oven without trying to move the shaped dough by itself.
And please remember those oven mitts.
That Dutch oven is extremely hot.
Baking the Bread
10. Transfer to the Dutch Oven
Carefully lift the parchment paper with the loaf on top and lower everything into the preheated Dutch oven.
The parchment stays underneath the bread.
Place 2 ice cubes between the parchment and the side of the Dutch oven to create steam.
Immediately place the lid on the Dutch oven.
11. Bake Covered
Bake at 475°F for 40 minutes.
This is where I want you to start paying attention to your own oven.
Forty minutes was the starting point for my loaf, but your bread may need a different amount of time.
12. Finish Baking Uncovered
Remove the lid and reduce the oven temperature to 450°F.
Continue baking uncovered.
If your bread is already beautifully browned, loosely place a piece of aluminum foil over the top to protect the crust while the center continues baking.
And this is where I strongly recommend using an instant-read thermometer.

Don't Let the Crust Fool You
This may be the most important lesson in this entire recipe.
A loaf can look absolutely beautiful on the outside and still not be finished in the center.
I’ve learned this one the hard way.
For years, I would look at my sourdough, see that gorgeous golden crust, and think, Surely she’s done.
Then I’d cut into it and discover that the center wasn’t quite where it needed to be.
So now I check.
Insert an instant-read thermometer into the thickest part of the bread, being careful to avoid putting the thermometer directly into the cream cheese filling or a blueberry pocket.
For this loaf, I watched the temperature closely.
Mine went:
170°F → 190°F → 196°F → 208°F
before I was comfortable taking it out.
And yes, it took longer than I originally thought it would.
That’s okay.
Your loaf may take less time. It may take about the same amount of time. It may take longer.
Your oven is your oven.
If your crust has reached the color you want but the center isn’t ready, loosely tent the bread with foil and continue baking until the center reaches approximately 200–205°F, or slightly above depending on the loaf.
The thermometer (paid link) gives you information that the clock simply can’t.
My biggest sourdough lesson:
Don’t just look at the bread. Check the bread.
That one little thermometer has taken so much of the guesswork out of baking sourdough for me.
13. Cool Completely
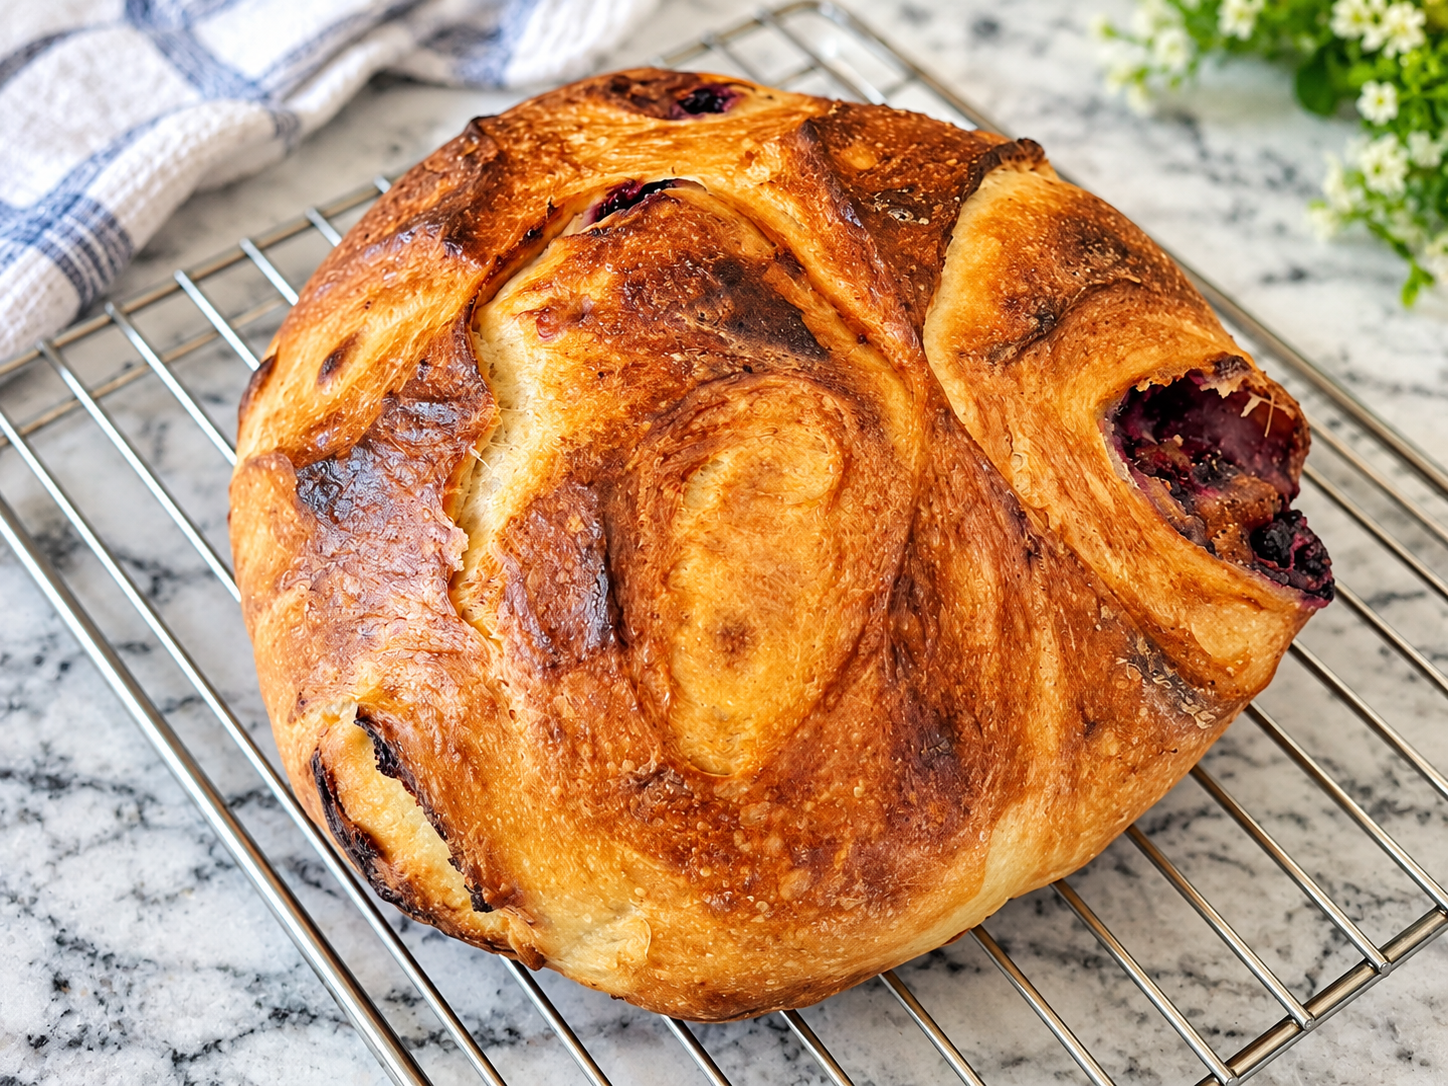
When the bread is finished, carefully remove it from the Dutch oven and place it on a cooling rack.
And now comes the hardest part.
Leave her alone.
I know.
You want to cut her.
I wanted to cut mine, too.
But this bread has a creamy filling, blueberries, and a substantial sourdough crumb. It needs time to cool and settle completely before slicing.
The inside continues to settle as it cools, and waiting will give you much cleaner slices.
Trust me. Walk away.
A Little Sourdough Reality Check
This loaf did not go according to my original plan.
I had dough going the night before and expected to continue with it early the next morning. Instead, my morning changed completely, and I had to go into work unexpectedly.
So I covered the dough and put it in the refrigerator.
Later, I brought it back out, let it warm up, worked with it again, and hoped for the best.
Honestly, I wasn’t sure it was going to work.
I could have thrown it out.
But I thought:
Nope. I’m not gonna throw it out. I’m gonna try.
So I did.
And I’m really glad I did.
That’s one of the things I love about sourdough. It teaches you to pay attention. You learn to watch the dough. You learn your oven. You learn when something needs more time.
And sometimes you have to adjust your plans along the way.
Nothing is ever exactly the same. Things don’t always go as planned. But that doesn’t mean they’re ruined.
Sometimes you just have to give it a try.

So... Was It Worth It?
Absolutely.
After everything this loaf put me through, I wasn’t entirely sure what I was going to find when I finally cut into it.
But look at her.
The crust is beautifully golden and crisp. The inside is soft and tender, with layers of sourdough dough, creamy vanilla cream cheese, and blueberries throughout.
And then there’s that little hint of lemon.
Not too much.
Just enough.
The combination of lemon, blueberries, cream cheese, and that crunchy sourdough crust is honestly amazing.
And that first bite?
So worth it.
Was it worth the extra baking time?
Yes.
Was it worth checking the temperature instead of guessing?
Absolutely.
Was it worth putting the dough in the refrigerator, coming back to it later, and giving it another chance when I wasn’t sure it would work?
100%.
Sometimes sourdough doesn’t go according to plan.
Sometimes your day doesn’t go according to plan either.
And sometimes you just have to say:
“Nope. I’m not gonna throw it out. I’m gonna try.”
I’m really glad I did.
More from Blooming Harbor
If you enjoyed this recipe, there’s more to explore around Blooming Harbor.
→ Explore my sourdough recipes
Or take a little detour into one of my personal series:
→ Reflections in the Mirror
There is always something else waiting to be discovered at Blooming Harbor.
2 Responses