
High-Protein Cheesecake
Ad / Affiliate Disclosure: As an Amazon Associate, I earn from qualifying purchases. This post contains affiliate links and advertisements. If you buy through these links, I may earn a financial commission from Amazon or Walmart (via ShopYourLikes) as an authorized shopping partner, at no extra cost to you.
This high protein cheesecake is creamy, simple to make, and doesn’t need a crust. It’s made with cottage cheese and Greek yogurt, blends up smooth in a food processor, and bakes into a lighter dessert that still feels like a treat. I like mine best with fresh Maine blueberries baked right in.
Prep: 15 minutes | Bake: 40 to 45 minutes | Chill: at least 4 hours or overnight | Serves: 6 | Pan: 9-inch springform or 9 x 9-inch baking pan
Why You'll Love This High Protein Cheesecake
It has no crust to fuss with, everything blends in one container, and it chills until it’s firm enough to slice. It’s a cozy dessert that doesn’t leave you feeling weighed down.
Ingredients
- 4 oz cream cheese, softened
- 1 cup 2% cottage cheese
- 1½ cups Greek yogurt
- 1 packet vanilla protein powder (I use Clean Simple Eats Simply Vanilla, see “The Brands I Use” below. Different powders absorb liquid differently, so the texture may vary slightly)
- 2 large eggs
- 1 tablespoon fresh lemon juice
- 1 teaspoon pure vanilla extract
- 2–4 tablespoons monk fruit sweetener, to taste
- Pinch of salt
The Brands I Use
These are the specific products I use when I make this cheesecake:
Kitchen Tools
You don’t need a lot of equipment for this recipe, which is one of the things I like about it.
For the pan, you can use either a 9-inch springform pan or a 9 x 9-inch baking pan. My preference is the 9-inch springform pan, because it gives the cheesecake that classic cheesecake shape and makes it especially easy to remove once it’s chilled.
For the smoothest batter, I use my food processor. A high-powered blender will work too if that’s what you have.
- 9-inch springform pan Amazon (paid link) | Walmart
- 9 x 9-inch baking pan Amazon (paid link) | Walmart
- Food processor Amazon (paid link) | Walmart
- High-powered blender Amazon (paid link) | Walmart
- Parchment paper Amazon (paid link) | Walmart
- Silicone spatula Amazon (paid link) | Walmart
- Measuring Cups & Spoons Amazon (paid link) | Walmart
- Cooling Rack Amazon (paid link) | Walmart
How to Make It
1. Prepare the Pan
Preheat your oven to 325°F. Line your pan with parchment paper, leaving enough paper extending above the sides to make lifting the chilled cheesecake out easier. If you’re using a springform pan, make sure the parchment covers the bottom well. If you’re using a baking pan, parchment that extends over the sides gives you convenient handles.
2. Make the Cheesecake Batter
Add the softened cream cheese, cottage cheese, and Greek yogurt to a food processor. Process until the mixture is completely smooth and creamy. This is an important step, because you want the cottage cheese to blend in fully. The finished batter should be silky smooth with no visible curds.
Add the eggs, lemon juice, vanilla, protein powder, monk fruit sweetener, and salt. Process just until everything is incorporated and the batter is smooth. There’s no need to keep processing once it has come together.
3. Add Optional Mix-Ins
If you’d like a little fruit, gently fold a small handful of fresh blueberries or raspberries into the batter before pouring it into the pan. Keep the amount modest so the fruit doesn’t affect the way it sets. You can also leave the batter plain and add fresh fruit after baking.
4. Bake
Pour the batter into your prepared pan. Gently tap the pan on the counter a few times to release any larger air bubbles. Bake at 325°F for 40 to 45 minutes. Start checking around the 40-minute mark. The edges should look set, while the center should still have a slight jiggle when you gently move the pan. That little bit of movement is what you want, because the cheesecake continues to set as it cools.
5. Cool
Remove the cheesecake from the oven and let it cool on the counter until it’s no longer warm to the touch, about 1 to 2 hours. Don’t rush this step. Cooling before it goes in the refrigerator gives it time to settle and makes the texture much better.
6. Chill Before Slicing
Once cooled, cover it and refrigerate for at least 4 hours. For the best texture, I recommend chilling it overnight. It becomes firmer and creamier as it chills, and it’s much easier to slice when it’s thoroughly cold.
Tips for the Creamiest Cottage Cheese Cheesecake
Blend the cottage cheese until there are no visible curds, since that’s what gives the smooth, silky texture. Let the cheesecake cool before you chill it, and give it at least four hours in the refrigerator, or overnight if you can wait.
Simple Add-Ins & Toppings
This cheesecake is delicious on its own, but a few simple additions can make it feel a little more special.
- Fresh Berries: Top slices with fresh blueberries, raspberries, or both.
- Warm Berry Topping: Gently warm a small amount of berries until they soften and become a little saucy, then spoon over each slice just before serving.
- Greek Yogurt & Berries: Add a small dollop of Greek yogurt and a few berries for an extra creamy finish.
- A Little Extra Lemon: Add a touch more fresh lemon juice to the batter for a brighter flavor.
The cheesecake really doesn’t need much. A few berries is enough to make each slice feel special.
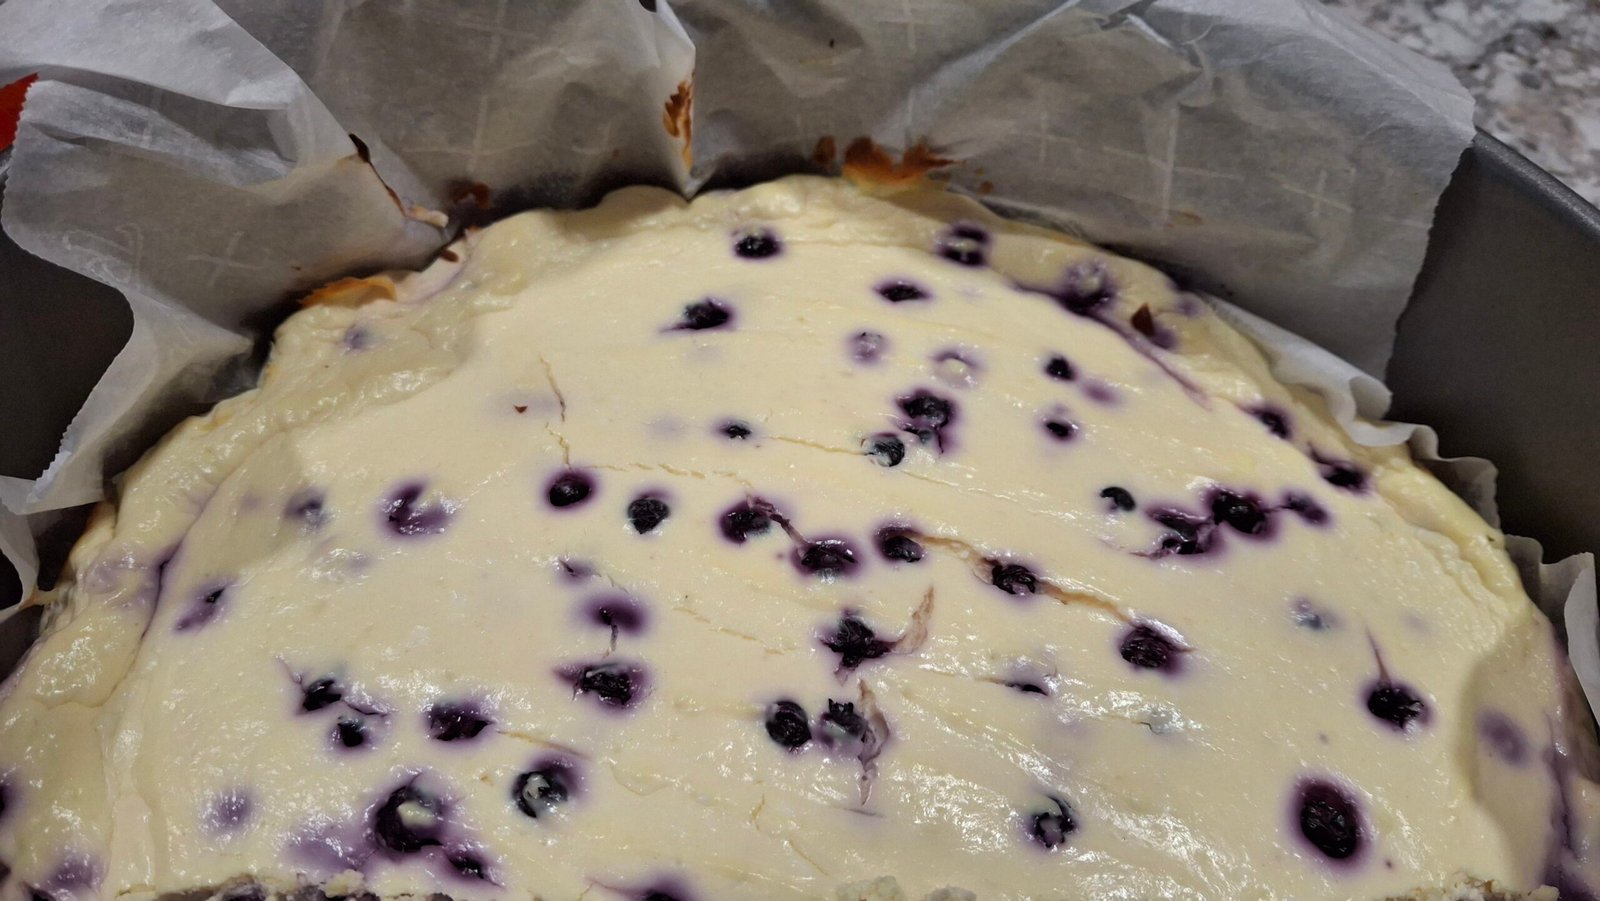
My Blueberry Version
I added fresh blueberries from Williams Family Farms in Clifton, Maine to mine, and I loved how they turned out. The blueberries add little bursts of fresh berry flavor throughout the creamy cheesecake without needing a separate topping.
Storing and Serving
Keep leftover slices covered in the refrigerator, where mine keep for up to 5 days. If you’re saving a slice for later, I keep mine in an airtight glass container (paid link). Enjoy this one cold, creamy, and straight from the refrigerator.
Nutrition (Approximate)
Per serving, based on 6 servings: about 140 calories, 8g fat, 3g carbohydrates, 14g protein. Values vary by brand, so this is an estimate.
Frequently Asked Questions
Can I use a blender instead of a food processor?
Yes. A high-powered blender works too, as long as the batter ends up completely smooth.
Why does the center still jiggle when I take it out?
A slight jiggle is what you want. It sets as it cools and chills.
Do I have to chill it overnight?
At least 4 hours, but overnight gives the best texture.
How long does it keep?
Mine keeps in the refrigerator for up to 5 days. Store it covered so it stays fresh and doesn’t pick up other flavors.
So I’m curious…
Do you like your cheesecake plain and creamy, or piled high with berries? Tell me in the comments. And if you make it, I’d love to hear how it turned out.
If You Enjoyed This, You Might Also Like
Sourdough Discard Donut Holes: A simple way to use up your discard.
Sourdough Discard Zucchini Bread: Cozy, moist, and perfect with a cup of tea.
Ninja Creami Recipes: Creamy, high-protein desserts straight from the freezer.